Showing posts with label recipe. Show all posts

Monday, 30 March 2015

My Week - Wood Conditioner, New Tree, and Pumpkin Pound Cake

My wood conditioner! Isn't it lovely?
So, the other week I bought new cutting boards. My old, cheap bamboo ones were starting to get splintery and gross, so I finally bit the bullet and bought beautiful new maple hardwood boards. Coincidentally, at around the same time, I ran across this post on the Joybilee Farm blog. I decided to follow the simple recipe and make my own wood conditioner. This way, I'd know exactly what was in it, and be able to make more when I ran out.

Apparently, it is literally impossible to buy organic essential oils in this town. I see a lot of people recommending Mountain Rose Herbs, but when I went to order from them, the sweet orange essential oil I wanted turned out to be a restricted item, meaning they couldn't ship it to Canada. If you're in the States, though, they really do come highly recommended. Anyway, after going to several stores, I settled for regular 'natural' essential oil. The salesperson at the health foods store said that the reps from the company they sourced from had told her it was technically organic, but not certified. Well, if she says so. It was the best I could get, so I settled. My life, it is so hard.

The rest of the ingredients were easy to source. And let me tell you, the finished product smells freaking amazing. I used extra virgin coconut oil, so the scent is a very strong, tropical coconut and orange, with a trace of honeyed beeswax. And, since it's completely natural, when you're done pouring the conditioner into it's jar, you can rub the leftovers on your hands, since it works as a body-safe moisturizer as well. And then you, too, can smell like a tropical fruit salad, which is all a person can ask for, really.

Here's one of my boards, half-conditioned, to show you the difference:


For the life of me I could not get a picture that showed the lustre of the conditioned wood. It's the darker section, by the way. But I assure you that it looks marvelous. And smells incredible.

I also got a little Meyer Lemon tree! It came with over thirty blossoms, though none, for some reason, on one big branch. Anyway, the blossoms are gorgeous.


I'd never smelled a lemon blossom before. It was lovely, and not what I'd expected. Almost like a sweet, light jasmine. I'm hoping I might actually get some lemons. Heaven knows I'm tired of throwing tons of cash at bags of tiny organic lemons that go moldy after approximately two hours in the house.

Pumpkin-y.
Through my blog-browsing, I also came across a recipe for pumpkin pound cake, from Back To Our Roots. I did it as mini pound cakes and one loaf, instead of in a bundt pan. They were delicious, but turned out pretty heavy. I wonder if it's because I didn't mix enough? Next time I'll really cream the heck out of the butter and sugar etc.

And, my seedlings are surviving so far. I have four pepper sprouts, and nine tomatoes, as well as three types of basil and some flowers. I've been keeping them all under the plastic wrap, which seems to be working to keep them alive. I'll take some pictures once there's finally something to see.

Also, I had to put the mint plant outside, on account of discovering that it had a MASSIVE BUG INFESTATION. I was terrified that it would get my sprouts, so out the mint went. It's really thriving, though. People aren't kidding about keeping it in a pot, I feel like it would happily take over everything, like a peppermint Napoleon.

Of course, I can't leave without blessing you with a picture of the cat, trying to sleep while an irritating man takes close-up photos of her face:


You're welcome.


Sunday, 23 February 2014

Mushroom and Thyme French Toast

Thyme for dinner.
This recipe is from a copy of the Fall 2013 Cuisine Tonight magazine. It's amazingly filling! I always end up with leftovers, which are just as delicious (maybe more?) reheated the next day.

For the toast:

- 4 slices challah (or any light, egg-based bread - I usually use German egg braid)
- 2 eggs
- 1/2 c. heavy cream
- 2 tsp. chopped fresh thyme
- salt and back pepper to taste
- 1 tbsp. unsalted butter

For the sauce:

- 8 oz. cremini mushrooms, sliced
- 3.5 oz. shiitake mushrooms, stemmed and sliced
- 2 tbsp. vegetable oil
- 1/2 c. sliced onion
- 2 tbsp. unsalted butter
- 2 1/2 tsp. tomato paste
- 2 1/2 tsp. all-purpose flour
- 1/4 c. dry sherry
- 3/4 c. low-sodium vegetable broth (or, if you aren't going for vegetarian, chicken broth works very nicely)
- 2 tbsp. cream cheese
- 1 tsp. chopped fresh thyme

1. Preheat broiler with rack 6 inches from element.

2. Broil the bread until golden on both sides, about 5 minutes. Let bread cool.

3. Whisk eggs, cream, and 2 tsp. thyme in a shallow dish; season with salt and pepper. Add bread; soak 10 minutes, turning often.
Pro tip: be more efficient at mealtimes by utilizing a thyme vortex!

4. Saute mushrooms in oil in a saute pan until browned, 6-7 minutes. Transfer mushrooms to a bowl. Saute onion in the same pan in 2 tbsp. butter, 1-2 minutes.

5. Stir in tomato paste and flour; cook 1 minute. Whisk in sherry until thickened. Stir in broth and mushrooms and cook about 2 minutes. Whisk in cream cheese and 1 tsp. thyme; keep warm.

6. Fry bread in 1 tbsp butter in skillet until browned on both sides, about 5 minutes. Serve French toast with mushroom sauce.
I like to fry the toast in the same pan I cooked the sauce in - more flavor, less washing up.
Enjoy!

Sunday, 16 February 2014

Spinach Salad with Honey Bacon Dressing

The Salad.
After the heavy dinner we had on Valentine's Day, I decided to make something a litter fresher and lighter the next evening. This is our favourite salad. I adapted the dressing from Alton Brown's Warm Bacon Dressing - I found his version a little to vinegary for me, so I cut the vinegar down a bit and replaced the sugar with a generous dollop of sweet, warming honey.

This recipe feeds two people pretty well all on it's own. With the addition of fresh bread with butter and a side like soup or sliced chicken breast, it could easily be extended to feed four.

The Salad:

- about four loose handfuls' worth of spinach, leaves washed and stems trimmed
- 6 strawberries, sliced (3 strawberries per portion)
- 2 hard-boiled eggs, peeled and sliced (one egg per portion)
- 6 strips of thick-cut bacon, diced

Nice additions: in the past I've added sliced chicken breast and avocado. Really, with salad, almost anything goes. I imagine toasted almonds would blend nicely with the honey in the dressing.

The Dressing:

- 3 tbsp of warm bacon grease
- 2 tbsp red wine vinegar
- 2-3 tbsp honey, warmed
- 1/2 tsp dijon mustard
- salt and pepper to taste
The smell of freshly-sliced strawberries is Summer to me.

1. Start frying the bacon. While it fries, slice strawberries and eggs in preparation for salad assembly. Warm
the honey in the microwave (15-20 seconds should do) just before bacon is finished.

2. Once bacon is done, remove with a slotted spoon and place in a paper-towel lined dish. Remove pan from heat and carefully measure out 3 tbsp of the grease. Be sure to scrape up and include as many cracklings as you can - that's where the majority of the flavour is.
Yummy yummy cracklings.

3. In a bowl, combine the bacon grease, vinegar, and mustard. Whisk thoroughly. Whisk in the honey, beginning with 2 tbsp, and adding more until it is to your taste. I usually end up with 3 tbsp, since I like a sweet vinaigrette. Add salt and pepper.
It should look like this. But if it doesn't, don't worry, I'm sure it's still delicious!

4. Assemble salad ingredients however you like, and drizzle the dressing over top. Enjoy!

And in case you weren't hungry yet...

Monday, 10 February 2014

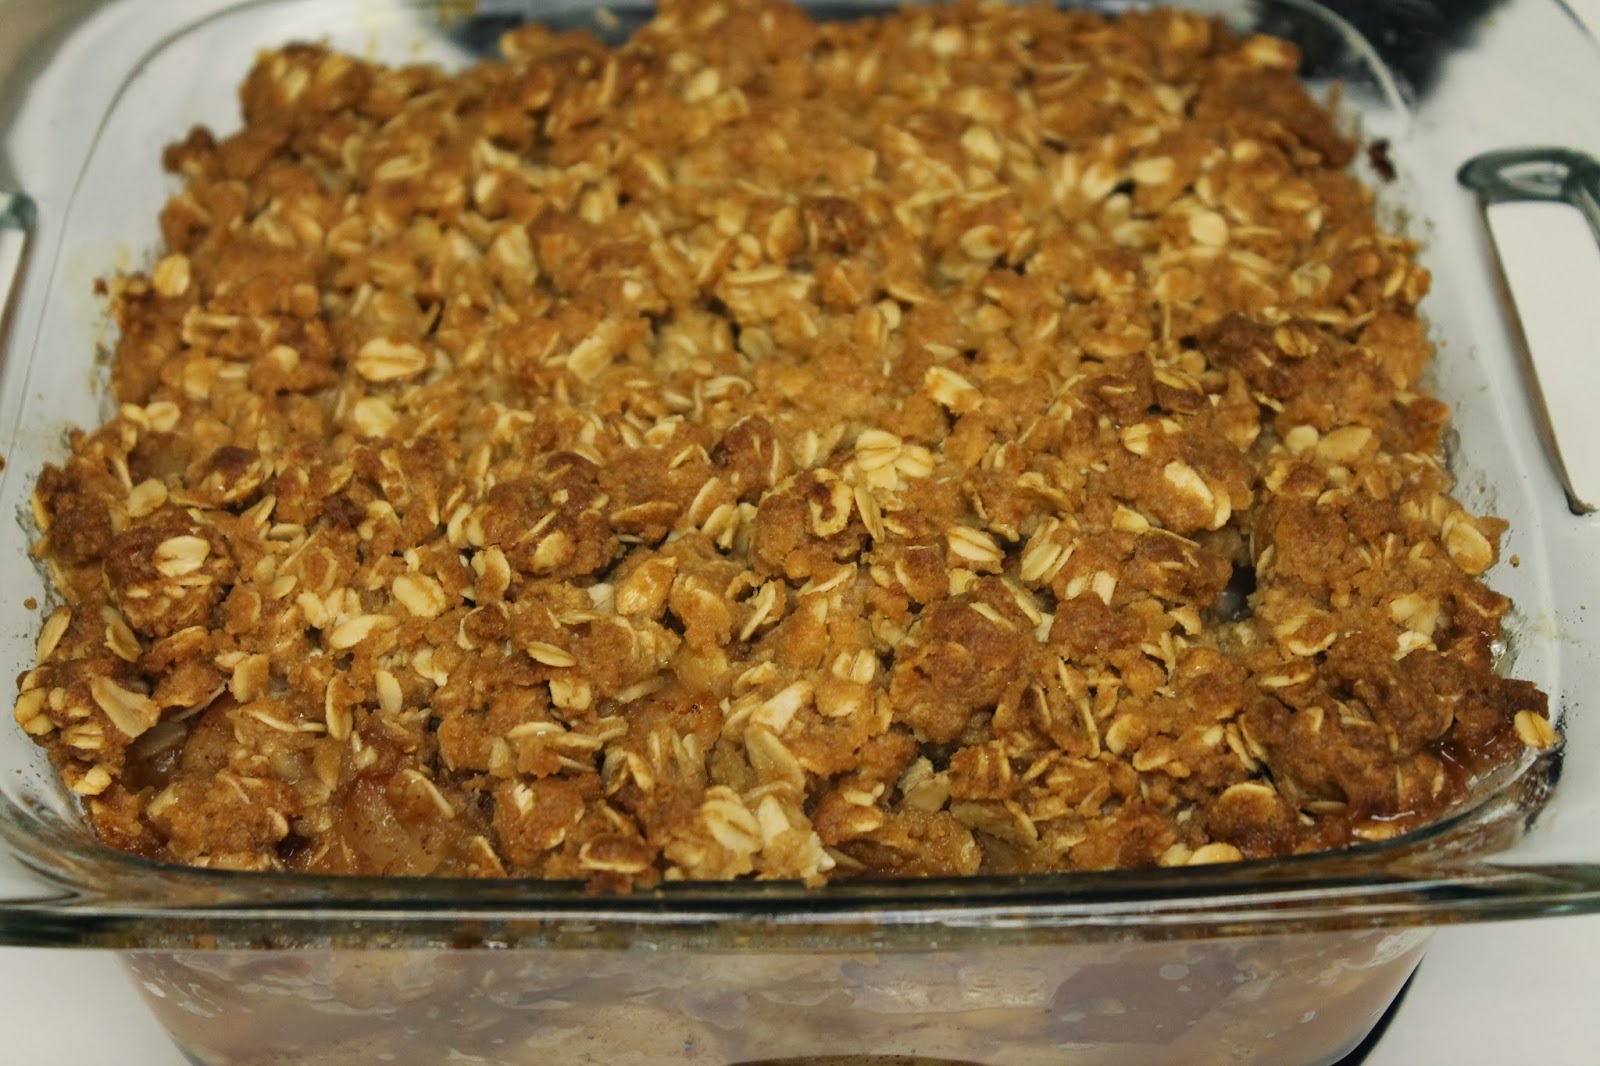
Pear and Apple Oatmeal Crisp

Straight out of the oven.
I had some fruit to use up, so I decided to try my hand at making a crisp. I adapted it from this recipe.

For the filling:
My eclectic bunch of fruit: three Gala apples, two Bartlett Pears, and one Bosc pear.

3 medium apples
3 medium pears
The zest of one lemon
1 tbsp lemon juice
1/3 c. granulated sugar
1 tsp ground cinnamon
1/4 tsp ground nutmeg
1 tbsp brandy

For the topping:

3/4 c. all purpose flour
3/4 c. old-fashioned rolled oats
1/2 c. brown sugar
1/2 c. butter, melted

1. Heat oven to 350'F. Butter a 9" square baking dish.

2. Core the fruit and cut into 3/4" pieces. Combine in a large bowl, then add the zest, lemon juice, sugar, spices, and brandy. Stir until thoroughly coated, and pour into the baking dish.

3. Combine flour, oats, and sugar. If you're going to use unsalted butter, add a generous pinch of salt. Slowly pour in the melted butter, then stir until all the flour is moistened and mixture is crumbly. Sprinkle over the filling.
Mixing the topping.
4. Bake the crisp for 1 hour to 1 1/2 hours, until juices have thickened and fruit has become tender. If topping begins to get too brown, cover with aluminum foil and continue baking until done.

Crisp!
Note: I ended up with a lot of juice. This could be because a) I had to use a smaller pan, and therefore the filling wasn't as spread out as it should have been; b) I could only bake the crisp for about an hour; or possibly c) pears might have more juice in them. Now, I don't mind the juice in the least, and when I heat my crisp up and stir it, the juice blends right in, but it isn't the most attractive look if you want to serve it at a luncheon or something. If you want to ensure you avoid it, do what my mother does when she bakes apple crisp: mix a bit of flour in with the sugar when making the filling, and it will absorb the excess juices.

Original recipe credit goes to Joanne Gallagher at www.inspiredtaste.net.


Saturday, 8 February 2014

Recipe: Garlic Roasted Butternut Squash

Roasted squash with prawns and honey whole-grain bread.
I'd never cooked squash from scratch before. I'd once bought some pre-peeled and cubed butternut squash to make soup with, and that was it for experience with it. However, the other day I bought one on a whim, determined to change that.

It was surprisingly easy. Even with the peeling and cutting, the prep took maybe five minutes - and the result was delicious. Anyway, here is the recipe, taken from Allrecipes.com:

Ingredients:

1 butternut squash, peeled, seeded, and cut into 1-inch cubes
2 tbsp olive oil
2 cloves garlic, minced
salt and ground black pepper to taste
Minced garlic and peeled, cut squash, ready to go.

1. Preheat oven to 400 degrees F (200 degrees C).

2. Toss butternut squash with olive oil and garlic in a large bowl. Season with salt and black pepper. Arrange coated squash on a baking sheet. (I used coarse sea salt.)
Okay, I didn't follow the rules exactly - I put the squash in a lightly greased baking dish instead. Still turned out awesome!
3. Roast in the preheated oven until squash is tender and lightly browned, 25 to 30 minutes.

Fresh from the oven!
It was very tasty for a simple dish. And really, with so few ingredients, it makes for a very flexible side that could be served with almost any main. It's definitely worth a try!

The recipe can be found here: http://allrecipes.com/recipe/simple-roasted-butternut-squash/. Credit goes to Allrecipes user MChele.

Monday, 3 February 2014

My Favourite Sauce, or, Why I Need A Kitchen Garden


Tonight, I made my favourite sauce. It's the ultimate in uncomplicated decadence: Alfredo. A classic and nearly impossible to get wrong, it nevertheless took me a few years to find the recipe that I prefer. It is the antithesis of low-calorie, and that's exactly how I like it. None of those healthier versions ever really did it for me.

Here's the recipe:

Alfredo Sauce

- 1/4 c. butter
- 1 1/2 c. freshly grated Parmesan
- 1 c. heavy cream
- 1 clove garlic, crushed
- 1/4 c. chopped fresh parsley
- 1/4 tsp. pepper

1. Melt butter in medium saucepan over medium low heat.
Melting the butter.
2. Add cream and simmer for 5 minutes, then add garlic and cheese and whisk quickly, until cheese is melted.
Whisking in the cream. I usually use 18% - so, basically, table/coffee cream.
Adding the garlic and Parmesan.
3. Stir in parsley and pepper and serve.

I like to use freshly-ground pepper from the Simple Organics Peppercorn Blend mill.

Chopping the garlic.

Notes: I always use three cloves of garlic instead of just the one. My partner adores garlic and so do I, but even with the three cloves the garlic isn't overwhelming. Additionally, I use a whisk for every step, and I find it ensures a much velvetier sauce than using a spoon at all. I always try and whisk the sauce for a minute or so off the heat after it's done, too, so that it can thicken nicely before I pour it over pasta.


This is the final product. Notice anything missing?

Hint: There's nothing green.
That's right, no damn parsley. Why? Because I didn't have any. This happens to me with ridiculous frequency - I go to make something quick for dinner, and I realise that either a) I haven't got the herbs at all or b) it's been a week since I used them, so they're too wilted to be much good.

Which is why I'm finally making myself a kitchen garden. I have suffered needlessly for far too long.