Showing posts with label kitchen. Show all posts

Friday, 28 February 2014

Quick Tortellini Soup


This is the first recipe I've improvised in a long time, especially since I'm trying to get some use out of all the cooking magazines I keep buying. It's very quick, simple, and delicious, exactly what's needed for a weekday night.

Tortellini Soup (for 4):

4 c. chicken broth (if you want to go vegetarian, replacing with vegetable broth will do so)
1 large package of tortellini
1 tbsp olive oil
2 cloves garlic, diced
1/2 c. diced shallots or onions
1/2 c. diced tomatoes
4 generous handfuls of washed, chopped spinach
1/4 c. white wine
1 tsp. sea salt (or to taste)
generous pinch of pepper

For the croutons:

eight slices of day-old baguette
enough olive oil to brush over the tops of each slice
pinch of parmesan cheese per slice (about 1/4 c.)

1. Preheat oven to 300'C. While it does that, heat olive oil in large, heavy pot.

2. Add shallots to the oil, cook until beginning to turn translucent. Add garlic and cook a minute longer.

3. Deglaze pot with white wine; cook down for a minute.  Add broth and simmer for another minute. While it does so, prepare the croutons: place each slice of bread on a baking sheet. Brush the top of each with a bit of olive oil, then add a pinch of parmesan cheese. Place into the preheated oven.

4. Add tomatoes to the broth. Simmer another minute, then add the tortellini. Cook according to the time indicated on the packaging.

5. Taste the broth. Add the salt, adjusting to taste, then add the pepper. Take the soup off of the heat and add the spinach immediately and all at once, stirring in thoroughly.

6. Ladle soup into four bowls. Remove croutons from the oven (they should be crisp and lightly golden brown) and place two atop the soup in each bowl. If desired, garnish with a bit of extra parmesan.

Enjoy!

Note: this soup makes tasty leftovers, too!


Sunday, 23 February 2014

Mushroom and Thyme French Toast

Thyme for dinner.
This recipe is from a copy of the Fall 2013 Cuisine Tonight magazine. It's amazingly filling! I always end up with leftovers, which are just as delicious (maybe more?) reheated the next day.

For the toast:

- 4 slices challah (or any light, egg-based bread - I usually use German egg braid)
- 2 eggs
- 1/2 c. heavy cream
- 2 tsp. chopped fresh thyme
- salt and back pepper to taste
- 1 tbsp. unsalted butter

For the sauce:

- 8 oz. cremini mushrooms, sliced
- 3.5 oz. shiitake mushrooms, stemmed and sliced
- 2 tbsp. vegetable oil
- 1/2 c. sliced onion
- 2 tbsp. unsalted butter
- 2 1/2 tsp. tomato paste
- 2 1/2 tsp. all-purpose flour
- 1/4 c. dry sherry
- 3/4 c. low-sodium vegetable broth (or, if you aren't going for vegetarian, chicken broth works very nicely)
- 2 tbsp. cream cheese
- 1 tsp. chopped fresh thyme

1. Preheat broiler with rack 6 inches from element.

2. Broil the bread until golden on both sides, about 5 minutes. Let bread cool.

3. Whisk eggs, cream, and 2 tsp. thyme in a shallow dish; season with salt and pepper. Add bread; soak 10 minutes, turning often.
Pro tip: be more efficient at mealtimes by utilizing a thyme vortex!

4. Saute mushrooms in oil in a saute pan until browned, 6-7 minutes. Transfer mushrooms to a bowl. Saute onion in the same pan in 2 tbsp. butter, 1-2 minutes.

5. Stir in tomato paste and flour; cook 1 minute. Whisk in sherry until thickened. Stir in broth and mushrooms and cook about 2 minutes. Whisk in cream cheese and 1 tsp. thyme; keep warm.

6. Fry bread in 1 tbsp butter in skillet until browned on both sides, about 5 minutes. Serve French toast with mushroom sauce.
I like to fry the toast in the same pan I cooked the sauce in - more flavor, less washing up.
Enjoy!

Saturday, 15 February 2014

Lobster

So, as I mentioned in 'What's The Plan?', I wanted to make lobster for Valentine's Day. And I did! Unfortunately, I neglected to take pictures.

Anyway, it was... okay? I followed the directions and boiled the frozen lobster tails for about 4 or 5 minutes. They really were very pretty afterwards. I served them along with twice-baked potatoes and teriyaki steak. And then, my partner announces that they have never had lobster before. And, it turns out that my partner does not, in fact, actually like lobster.

To be fair, though, it wasn't amazing lobster. Like I said, it was just okay. The middle had the sweet mild flesh I love, but most of it was a bit dry and tasteless - maybe I boiled it for too long? The melted garlic butter I served it with helped save it, but evidently it wasn't tasty enough to convert my partner to lobster (my partner does not, apparently, like crab either, so maybe that's just that).

However, the steak was a big hit!

Monday, 10 February 2014

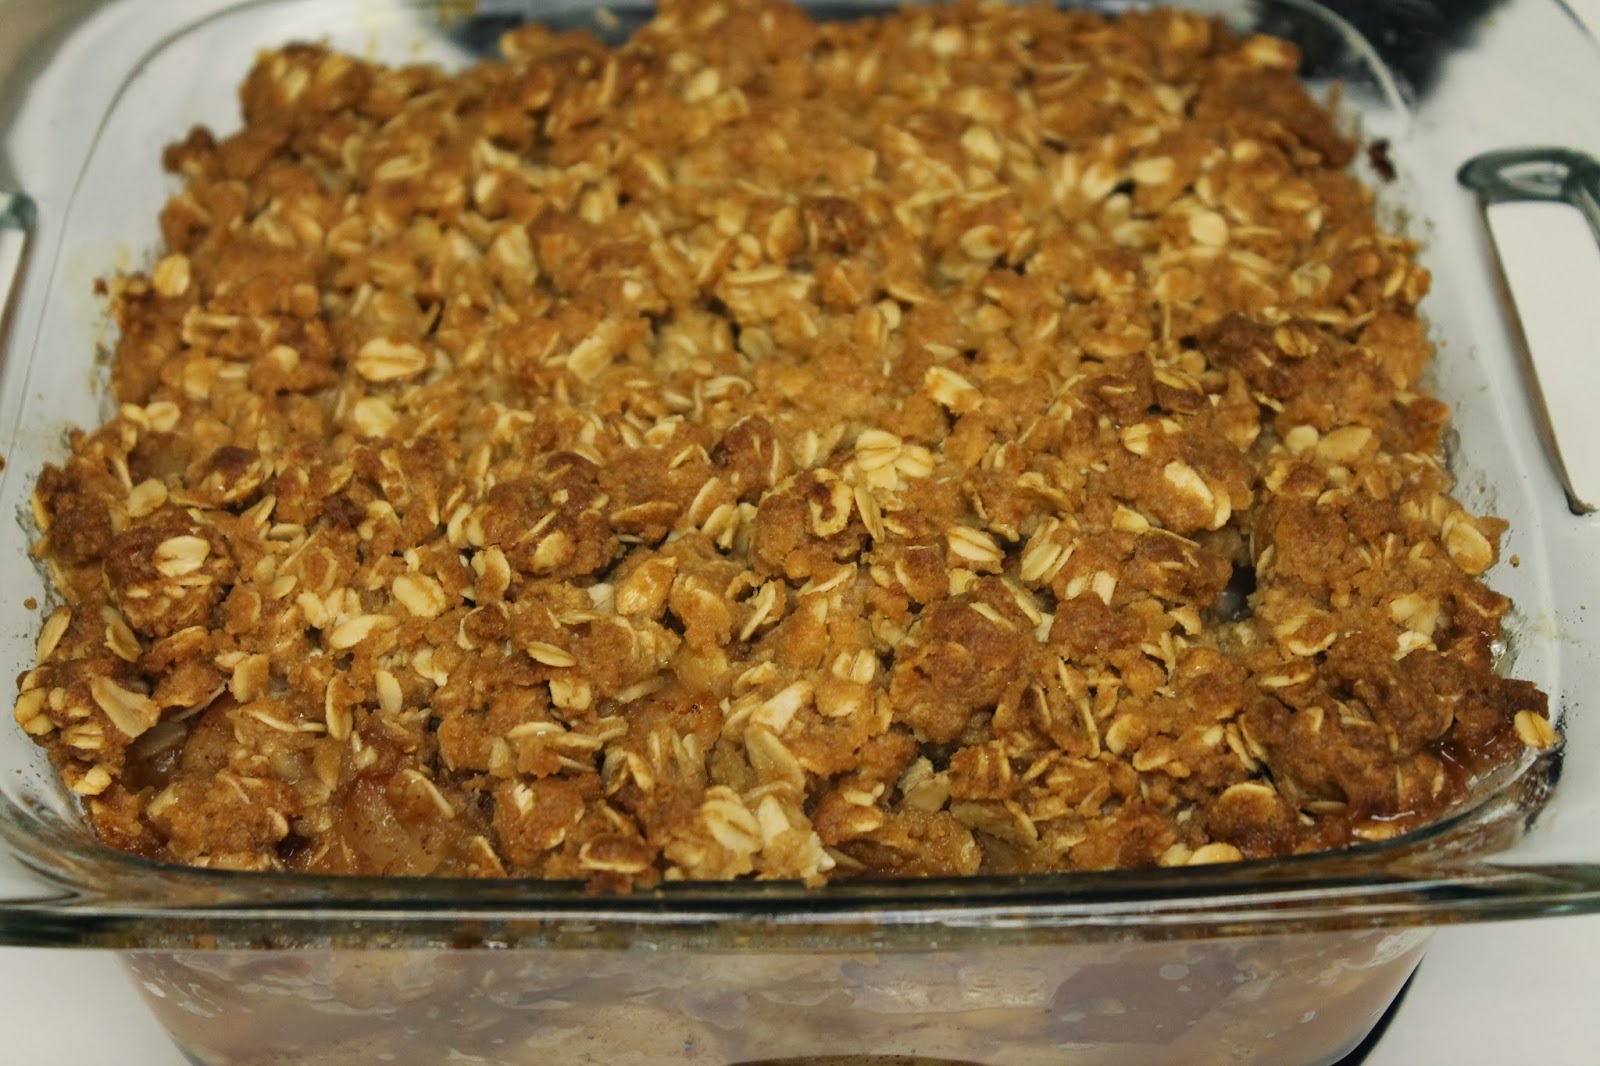
Pear and Apple Oatmeal Crisp

Straight out of the oven.
I had some fruit to use up, so I decided to try my hand at making a crisp. I adapted it from this recipe.

For the filling:
My eclectic bunch of fruit: three Gala apples, two Bartlett Pears, and one Bosc pear.

3 medium apples
3 medium pears
The zest of one lemon
1 tbsp lemon juice
1/3 c. granulated sugar
1 tsp ground cinnamon
1/4 tsp ground nutmeg
1 tbsp brandy

For the topping:

3/4 c. all purpose flour
3/4 c. old-fashioned rolled oats
1/2 c. brown sugar
1/2 c. butter, melted

1. Heat oven to 350'F. Butter a 9" square baking dish.

2. Core the fruit and cut into 3/4" pieces. Combine in a large bowl, then add the zest, lemon juice, sugar, spices, and brandy. Stir until thoroughly coated, and pour into the baking dish.

3. Combine flour, oats, and sugar. If you're going to use unsalted butter, add a generous pinch of salt. Slowly pour in the melted butter, then stir until all the flour is moistened and mixture is crumbly. Sprinkle over the filling.
Mixing the topping.
4. Bake the crisp for 1 hour to 1 1/2 hours, until juices have thickened and fruit has become tender. If topping begins to get too brown, cover with aluminum foil and continue baking until done.

Crisp!
Note: I ended up with a lot of juice. This could be because a) I had to use a smaller pan, and therefore the filling wasn't as spread out as it should have been; b) I could only bake the crisp for about an hour; or possibly c) pears might have more juice in them. Now, I don't mind the juice in the least, and when I heat my crisp up and stir it, the juice blends right in, but it isn't the most attractive look if you want to serve it at a luncheon or something. If you want to ensure you avoid it, do what my mother does when she bakes apple crisp: mix a bit of flour in with the sugar when making the filling, and it will absorb the excess juices.

Original recipe credit goes to Joanne Gallagher at www.inspiredtaste.net.


Saturday, 8 February 2014

Recipe: Garlic Roasted Butternut Squash

Roasted squash with prawns and honey whole-grain bread.
I'd never cooked squash from scratch before. I'd once bought some pre-peeled and cubed butternut squash to make soup with, and that was it for experience with it. However, the other day I bought one on a whim, determined to change that.

It was surprisingly easy. Even with the peeling and cutting, the prep took maybe five minutes - and the result was delicious. Anyway, here is the recipe, taken from Allrecipes.com:

Ingredients:

1 butternut squash, peeled, seeded, and cut into 1-inch cubes
2 tbsp olive oil
2 cloves garlic, minced
salt and ground black pepper to taste
Minced garlic and peeled, cut squash, ready to go.

1. Preheat oven to 400 degrees F (200 degrees C).

2. Toss butternut squash with olive oil and garlic in a large bowl. Season with salt and black pepper. Arrange coated squash on a baking sheet. (I used coarse sea salt.)
Okay, I didn't follow the rules exactly - I put the squash in a lightly greased baking dish instead. Still turned out awesome!
3. Roast in the preheated oven until squash is tender and lightly browned, 25 to 30 minutes.

Fresh from the oven!
It was very tasty for a simple dish. And really, with so few ingredients, it makes for a very flexible side that could be served with almost any main. It's definitely worth a try!

The recipe can be found here: http://allrecipes.com/recipe/simple-roasted-butternut-squash/. Credit goes to Allrecipes user MChele.

Project #1: Kitchen Composter plus Bonus Picture

The Kitchen Composter. Eco-friendly? Probably. Laurence-friendly? We'll see.

So the other day, I saw this at work. It was the only one there, and since I was feeling paranoid about my plants not getting enough nutrients and such, I bought it. It's stainless steel and has a filter in the lid to prevent any smells. And, it is pretty adorable for something that is essentially a little garbage digester.

Of course, after the fact, I do a bit of research, and it seems that I won't be able to actually make compost in such a tiny bin? I'm thinking that I may have to get another, larger one to keep on the patio, which is annoying, as I must ensure it is a) smell-proof, so as not to upset the neighbors or the strata; b) rat-proof, because we live right by the dumpsters and rats like to frolic about in our shrubbery; and c) inexpensive and reasonably attractive.

I really like the idea of a worm composting bin. Worms are cool and not smelly, and worm castings are supposed to be excellent compost. I wonder if I could get a few worms and just put them right in the bin? I do keep the bin indoors, after all. I'm seriously considering joining a gardening community online just so I can bother them with my asinine inquiries.

Anyway, in the meantime, I've been trying to be careful about what I put in my compost.

Pretty, pretty garbage.
That means nothing with seeds (such as tomato seeds) that might decide to randomly grow, no dairy, no meat or fat, etc. I do put my used teabags in, after removing the labels and staples. It seems to be handling it all well so far.

Meanwhile, today is Day 9 of Project #1. Here is what our garlic looks like now:

So proud of that stupid little sprout!
That's a terrible picture, but you get the idea. I'm not sure why the soil is cracking, since I keep it pretty moist. Well, whatever, as long as my sprout is happy.

Unfortunately, that is the only thing that has sprouted so far. I know I should be patient, but I'm starting to get worried. Seven of my seeds could have germinated by now, but haven't. I don't want to have to start over, but I guess I will if I have to. I refuse to give up, damn it!

And now, for the bonus picture, the thing everyone wants to see: my cat.

She is proud of the garlic sprout too. We look at it together. Seriously.


Sunday, 2 February 2014

Project #1: Seedlings: Days 2 and 3

Since I was at the store on the 1st (Canadian Tire, if you must know, which is the only place I've found so far that is carrying seeds this early) I picked up some flower seeds: Candy Stripe Cosmos; Viola (Comedy Mixed), and Dwarf Munstead Lavender.

They're all able to be grown in containers (I hope!) and I chose them to draw more bees and butterflies come Summer. Also, I figure that the lavender might have some other uses, such as in bathwater (or in cooking, if I'm feeling particularly adventurous).

Estimated germination times:

Cosmos: 7-10 days
Viola: 20-50 days
Lavender: 20-50 days

I'm keeping an eye out for Bee Balm. If I can't find any in the next month or so I suppose I'll have to order it online, which is an expense I don't need, but I'm determined to have the damn things.

Then, today, I was cutting up some fruit for breakfast and decided to try my hand at planting some more seeds. Unfortunately, the only two seeds I got from the Moro Blood Orange were both cut with the knife, one more severely than the other:
The two injured Moro Blood Orange seeds.
The organic Gala Apple seeds, with the exception of one, escaped unscathed:

The one seed now has an impressive scar to show the ladies but his life will never be the same.
 I put all the seeds in water to keep wet while I finished breakfast, and then later in the day I planted them. The orange seeds I put together, since they're both damaged anyway. The apple seeds I put in individual pots, labeling the cut one. I made up five apple pots all together, throwing away the other pips, since on the off-chance that they all sprout I don't actually need a forest of apple trees in my living room, even though that sounds really awesome.

I'm not sure about the germination times for the oranges and apples - I figure I'll just wait it out and see. If nothing happens, I'll try some other methods beyond simply planting them straight from the fruit.

A confession: I got impatient tonight (already!) and took a look at how the garlic was doing. It does seem to be growing a bit. I covered it back up with soil and am going to try to leave it alone now.

Project #1: Seedlings: Day One (Jan. 31st)

As mentioned, I'm making an effort to document my various projects and experiments. Here is my first project - starting seedlings for an apartment/patio garden.

This is what I started with on January 31st:

Peat seeding pots; seed starter; potting mix; various seeds; and a small black cat.
Seeds: Summer Savory; Flat Parsley; Cilantro; Lady Bug Cherry Tomato; Rosemary; Greek Oregano; Minette Basil; Sage, and Thyme.

I also had:

two cloves of garlic that had started sprouting - just a tiny bit of green on the top and really small nubby rootlets;

three mystery citrus seeds that I had put aside a week ago and can't recall if they were from a lemon, orange, or blood orange, which probably won't sprout because I left them to dry on the counter all week;

and three fresh organic lemon seeds, rinsed off and planted immediately.

The sprouting garlic and mystery citrus.
The garlic, ready to be planted - the only one not staring in a peat pot.
The various plants, watered and ready to be shoved behind a box next to the heater.
For those who are wondering how long results will take, these are the estimated germination times:

Basil: 7-14 days
Cilantro: 7-14 days
Oregano: 14-21 days
Parsley: 10-28 days
Rosemary: 7-28 days
Sage: 7-14 days
Savory: 5-21 days
Thyme: 14-28 days
Tomato: 7-14 days
Garlic: already sprouting
Mystery Citrus: ?

Fresh lemon: 2 weeks to 1 month, possibly longer

I planted three seeds to a pot, except for the two garlic and the ones with really tiny seeds, in which case it probably ended up more like 9 to a pot (oh well). My plan is to take the best seedling from each for my kitchen herb garden, and then plant the rest in big containers and let them flower outside to attract bees, butterflies, and neighbors for my cat to watch through the window.

The soonest I can expect any sprouts would be on Feb. 5th, possibly sooner if the garlic grows fast. I have no idea how quickly garlic grows, so we will have to wait and see.